
Enhance TCP/IP Connectivity and use every 68k Application!
This is the original article written by Tyler Sable, spam at fenestrated separated by dot from net. You can find him on the 68kMLA forums as TylerEss. Since the original article is not more available on the web I post it here in my blog with the software installer packages. Enjoy!
One of the biggest problems with using an older Macintosh with a 68k processor is interoperability with more modern computers, over the internet. Other shortcomings, such as a small amount of RAM or slow processor speed, can be compensated for at a minimal cost at these machines’ age. The world has moved beyond AppleTalk, however, and we will get along a lot better if we can use TCP/IP for file sharing and printing.
System 7.5.5 does not come configured to use TCP/IP for either printing OR AppleShare. This article will show how to remedy this shortcoming without running into the crashing, failure to install, and general badness I had to wade through.
The first time I tried to install a modern system 7.5.5 on my SE/30, I simply could not get it to work. It turns out that the problem was due to my failure to install the updates in the correct order. By installing the updates in the order I list below, you will arrive at a very functional and stable system.
I recommend this configuration for any 68k Mac with at least a 68030 processor and 16MB of RAM. 16MB seems like a lot, but with our old RAM being so cheap on eBay, 16MB is easy to get and very important for a computer you intend to use on a daily or weekly basis.
If you have a 68030 Mac with less than 16MB of RAM and no way to upgrade, there’s still hope. Following this procedure but leaving out QuickTime 4 and MRJ leaves a System that will boot in just about exactly 4MB. This would leave 4MB for applications on an 8MB PowerBook.
CFM-68k Runtime Enabler Note:You will find that there is no need to install CFM-68k Runtime Enabler 4.0 (required by Navaigtor 4.0 and other software) if you follow the directions presented here. It is installed by LaserWriter 8.5.1.

Install System 7.5.5
The first step is to install System 7.5.3, which is downloadable from Apple here: 1, 2, 3, 4, 5, 6, 7, 8, 9, 10, 11, 12, 13, 14, 15, 16, 17, 18. Download all parts into one folder. After it is installed, install the System 7.5.5 Update, which is available from Apple here: 1, 2, 3, 4, 5. Now you’ll be running stock System 7.5.5. Restart.
Install OpenTransport
To form a base to add network software onto, install OpenTransport 1.1.2 (there’s no need to install 1.1.1 first). Download it here. Restart.
Install TCP/IP Networking Tools
Now you’ll install the updates that allow access to AppleShare and printing via TCP/IP. Make sure you run the Network Software Selector utility first to ensure you’re using OpenTransport. Restart if necessary.
First, install the AppleShare Client 3.7.4. Download it here.
Second, install the LaserWriter 8.5.1 updater. Download six images: 1, 2, 3, 4, 5, 6.
Restart.
Install TidBits
Install QuickTime 4.0.3. I can’t think of any particular reason to install this last 68k version instead of an older, possibly smaller version, but it has been working very well for me. Actually, I think this version supports Shockwave Flash movies, but don’t quote me on that. Download the QuickTime 4.0.3 installer here. If that link doesn’t happen to work, or you need a version localized for a different language, the page with download links is here.
Install Appearance Manager 1.0.3. The only way this software is available from Apple is as part of the entire SDK, which is about 4 MB in size. You’re probably only interested in the Appearance CDEV and INIT. Download the “manual install” file I developed for just the Appearance Manager software components here. When you’ve decompressed the file, you’ll find several folders, each named something inside your System Folder. Put the items into the place in your System Folder indicated by the name of the folder they live in.
Don’t forget to remove the “Color” and “WindowShade” control panels from your Control Panels folder. They are not necessary/not compatible with the Appearance Manager. Place them in your “Control Panels (Disabled)” folder for safekeeping in case you decide to remove the Appearance Manager.
Restart.
Optional Java Support
Install the Macintosh Runtime for Java 2.0. This software isn’t supposed to run on 7.5.5, but it does so fine. It is the first version with a JIT compiler for 68k machines. Only install this if you have a fast 68040 and think you’ll run Java programs (or want to impress your friends with your nerdiness). To install it, download the “manual install” file I developed here. When you’ve decompressed the file, you’ll find several folders, each named something inside your System Folder. Put the items into the place in your System Folder indicated by the name of the folder they live in.
Restart.
Completion!
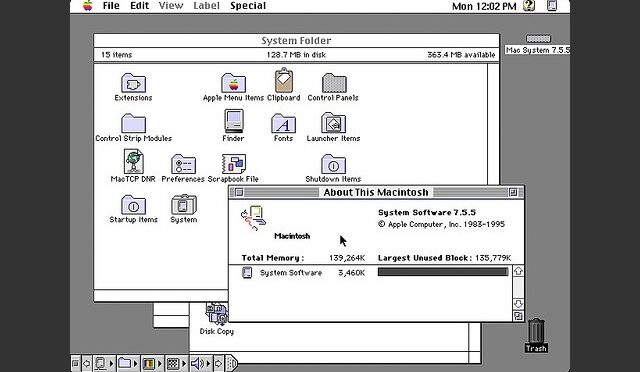
Party! You’ve now installed a very complete and functional System 7.5.5. It should boot in about 6MB of RAM (assuming a 128k disk cache) and support the running of nearly any 68k compatible program. Connectivity is greatly enhanced due to the TCP/IP functionality, and the stability is good.
Don’t forget to read the follow-up, System 7.5.5 Favorite Add Ons to get the scoop on all the other software Apple should have provided out-of-the-box.
This configuration is exactly what I run for my day-to-day work on a Macintosh SE/30 modified with an Asante IIsi/SE-30 ethernet card, 40Mhz DayStar Turbo040, IIsi adaptor card, and 80MB of RAM. It rocks.
Got any good ideas for how to improve this page? Email me. Spam at fenestrated seperated by dot from net.
Summary
Here’s the download links referenced, in a table for your enjoyment.
| System 7.5.3 Complete | Parts: 1 | 2 | 3 | 4 | 5 | 6 | 7 | 8 | 9 | 10 | 11 | 12 | 13 | 14 | 15 | 16 | 17 | 18 |
| System 7.5.5 Update | Parts: 1 | 2 | 3 | 4 | 5 |
| OpenTransport 1.1.2 | OT 1.1.2-Net Install.sea |
| LaserWriter 8.5.1 | Images: 1 | 2 | 3 | 4 | 5 | 6 |
| AppleShare 3.7.4 | AppleShare_Client_3.7.4.img.bin |
| Quicktime 4.0.3 | |
| Appearance Manager 1.0.3 | Appearance1.0.3.cpt |
| Macintosh Runtime for Java 2.0 | MRJ2.0.cpt |
